Before you fill your calendar with appointments, it's worth setting it up to fit you: your real working hours, how you view it and which days or time slots you're unavailable. That way your calendar only offers slots when you can actually see patients.
Define your working hours
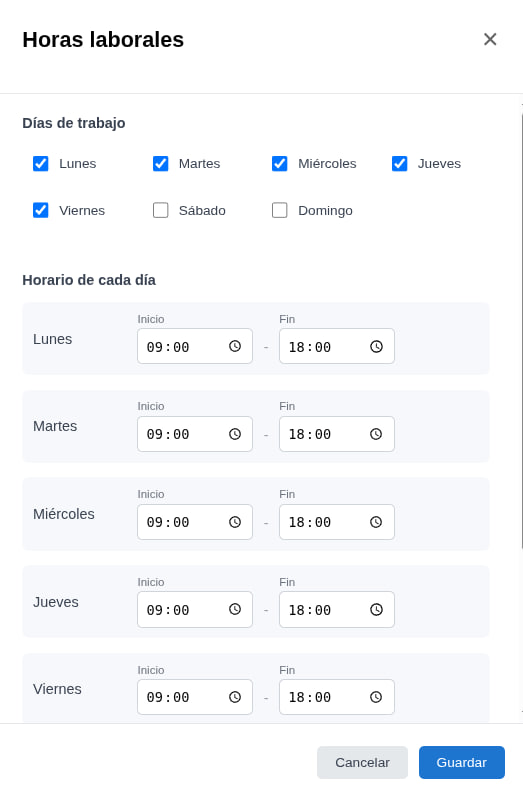
In the Working hours window you choose which days you work and from what time to what time. For example, Tuesdays from 9:00 to 18:00 and Wednesdays only from 12:00 to 14:00. With this, the calendar won't offer slots outside your hours.
Open Working hours
Go to the Calendar section and open the Working hours window from the settings icon (⚙) in the top right.
Set your days and hours
In Working days, check the days you see patients (Monday, Tuesday…). Then, in Hours for each day, set the start and end time for each one. When you're done, click Save.
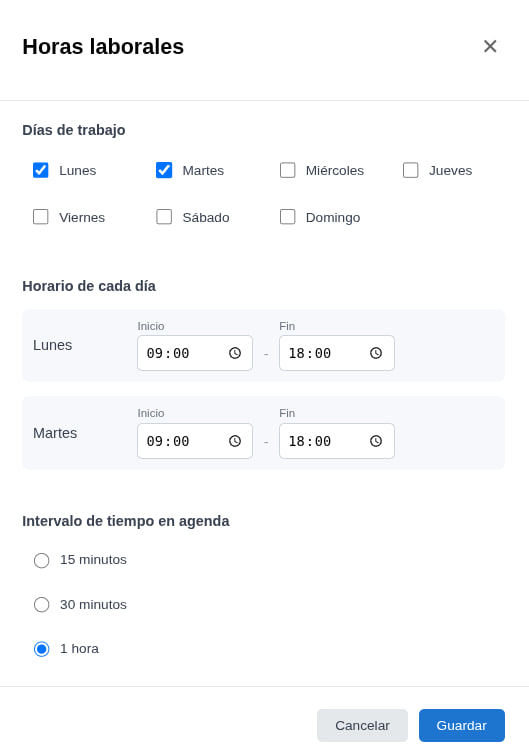
Choose the calendar interval
In that same window, further down, you have Time interval in the calendar: choose whether slots show every 15 minutes, every 30 minutes or every 1 hour, depending on the detail you need.
Tip
If you work with short or back-to-back sessions, the 15 or 30 minute interval gives you much more room to place appointments precisely.
Change the view (week or day)
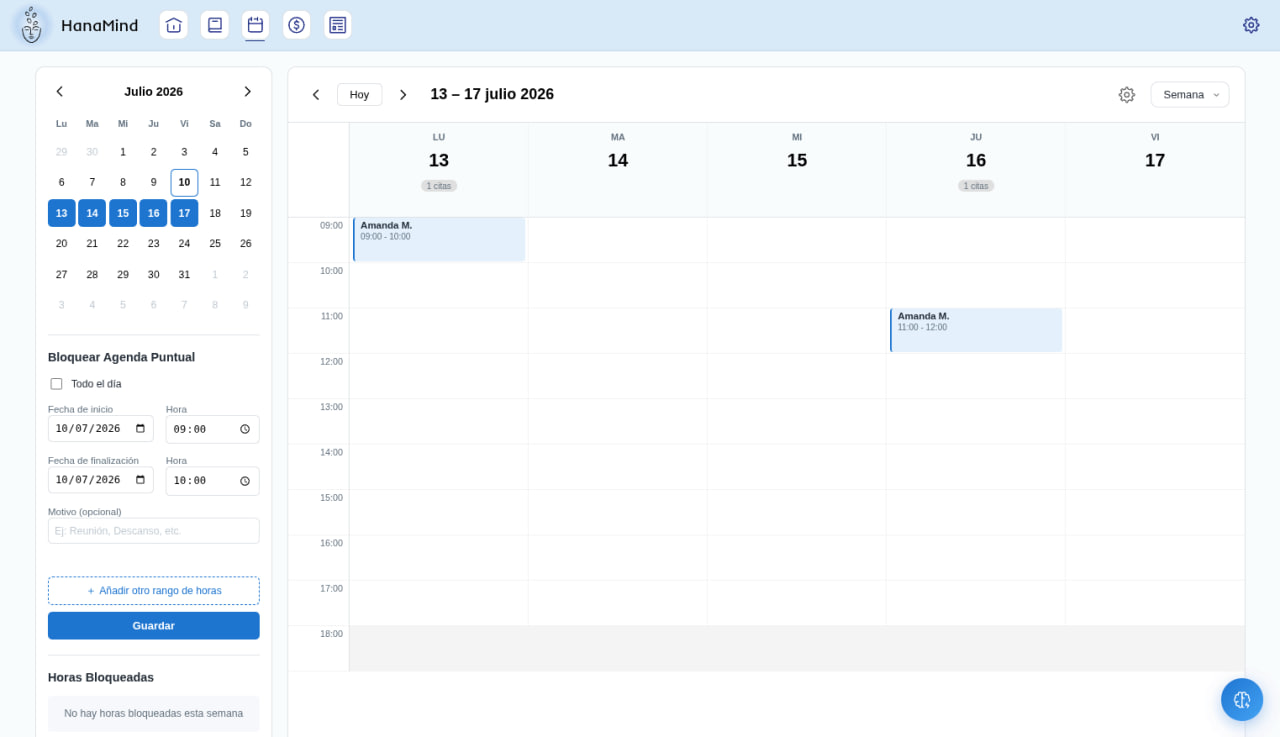
With the dropdown in the top right you switch between seeing the whole week or a single day.
Block days or hours
Sometimes you need to mark time as unavailable: holidays, a meeting, training, a day off… There are two ways to do it.
One-off block (a day or specific hours)
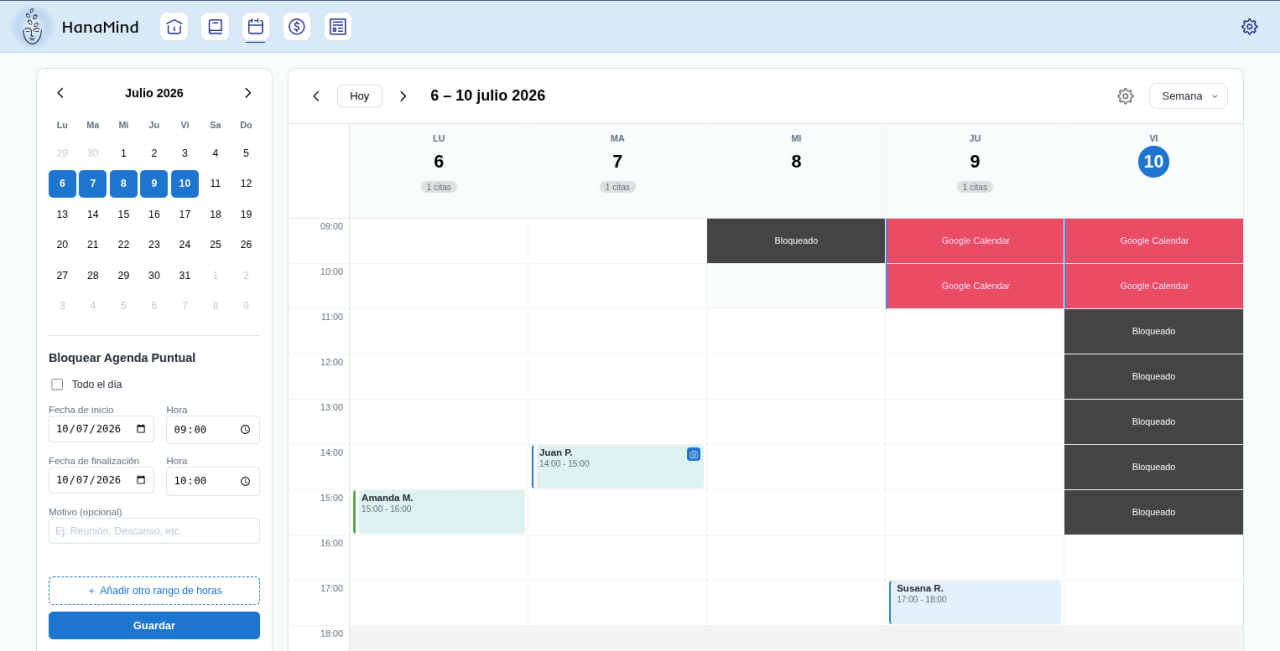
In the Block calendar (one-off) panel, to the left of your calendar:
Choose the scope of the block
Check All day to block the full day, or leave it unchecked to block only certain hours.
Set the dates and times
Fill in the start date and the end date with their times. If you need to, add a reason (optional): meeting, break, etc.
Add more ranges and save
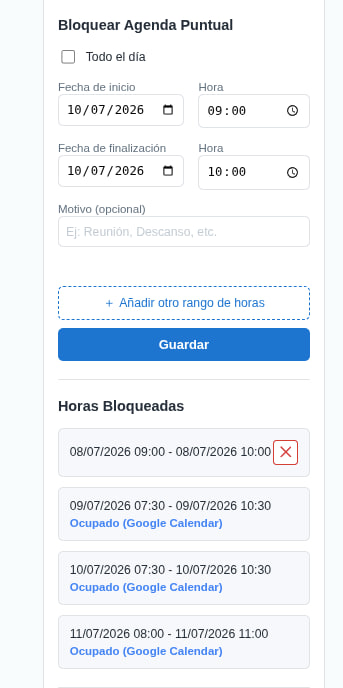
If you want to block several ranges, click + Add another time range. When it's ready, click Save.
Below, in Blocked hours, you'll see the list of your blocks: the ones you created (which you can delete with the ✕) and also the Busy (Google Calendar) times that arrive automatically from your calendar.
Recurring block (every week)
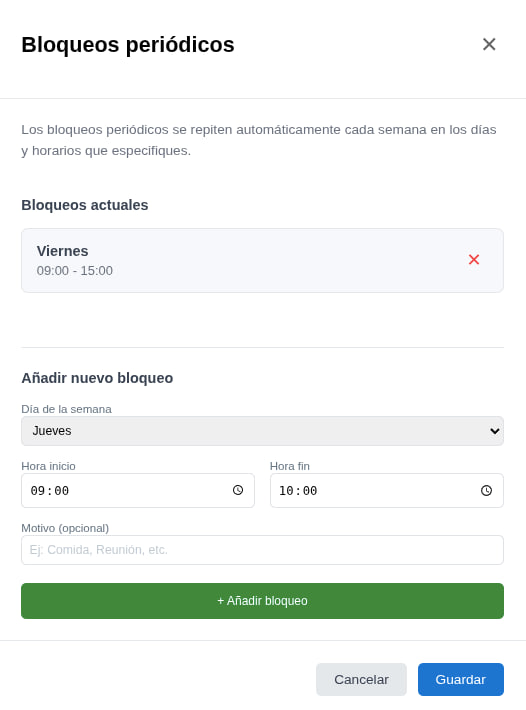
If there are slots you never work (for example, every Friday from 9:00 to 15:00), create them in Recurring blocks so they repeat automatically every week.
Add a recurring block
Choose the day of the week, the start time and the end time, and a reason (optional). Click + Add block.
Review them and save
The block appears under Current blocks, where you can delete it with the ✕. Click Save to apply the changes.
Sync with Google Calendar (two-way)
If you have Google Calendar activated, syncing is two-way:
- The appointments you create in HanaMind automatically appear in your Google Calendar.
- The events in your Google Calendar are reflected in HanaMind and block those hours, so no one is booked over them.
Give each calendar a color
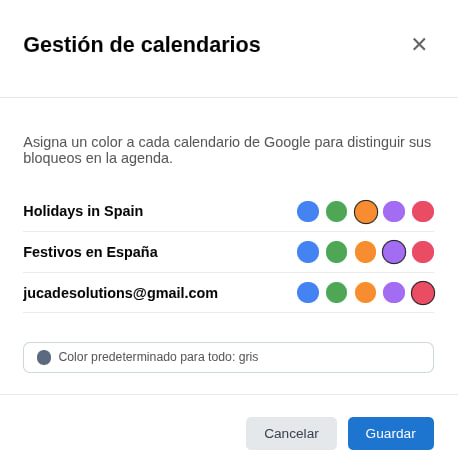
In Calendar management you assign a color to each Google calendar (holidays, your personal account, etc.) to tell their blocks apart at a glance within the calendar.
With everything applied, this is how your calendar looks: the blocks you created appear as Blocked and the Google Calendar events as Google Calendar. No one will be able to book over those hours.
Important
Without Google Calendar activated, the video call links for online appointments are not generated. If you see patients online, activate it following the Connect Google Calendar guide.